
Adding new images to the standard WordPress gallery
Today a client of ours asked how could they add some new photos to a WordPress Gallery originally created for them. After some searching on the web it was apparent that there was not too much info or tutorials on the topic.
Hence we thought it would be a great idea to post this procedure as a blog article in case others required the same advice.
Steps to add a photo to an existing WordPress photo gallery
Please note that this is based on the default WordPress Gallery Functionality that is installed native to WordPress. These steps are based on the latest version of WordPress which is 4.3.2 at the time of publishing.
Pre preparation
We recommend that the gallery images to be uploaded, be re-sampled to screen resolution (72dpi) prior to uploading the images. This will save time and upload bandwidth. This can be done in image editing software such as Adobe Photoshop your default image editing application.
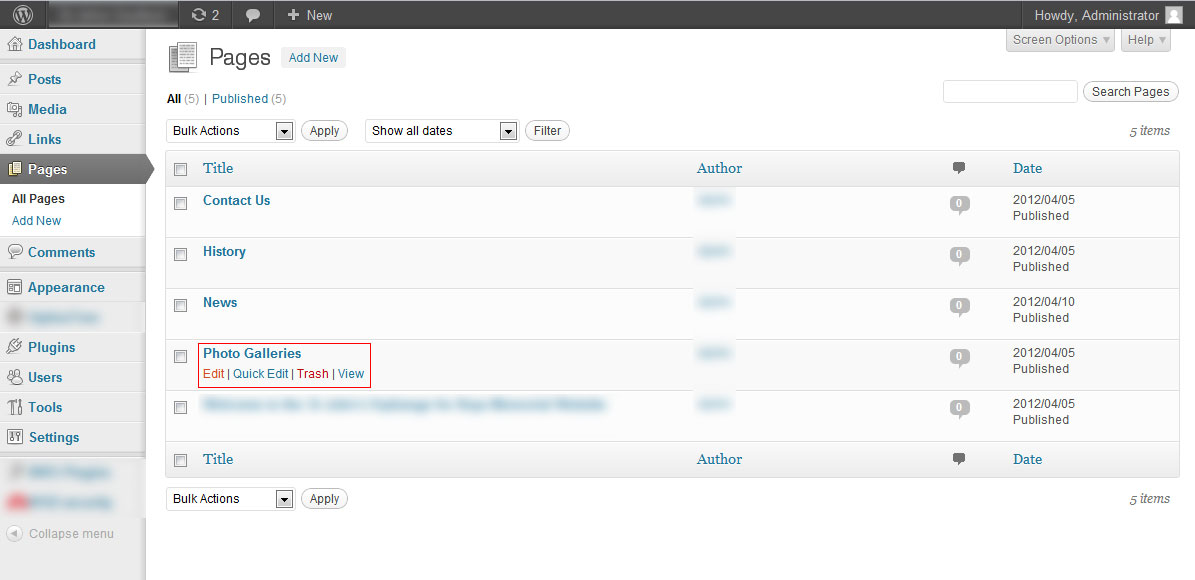
Step 1
Navigate to the page where the gallery has been initially set-up and click the ‘edit’ function to edit that page
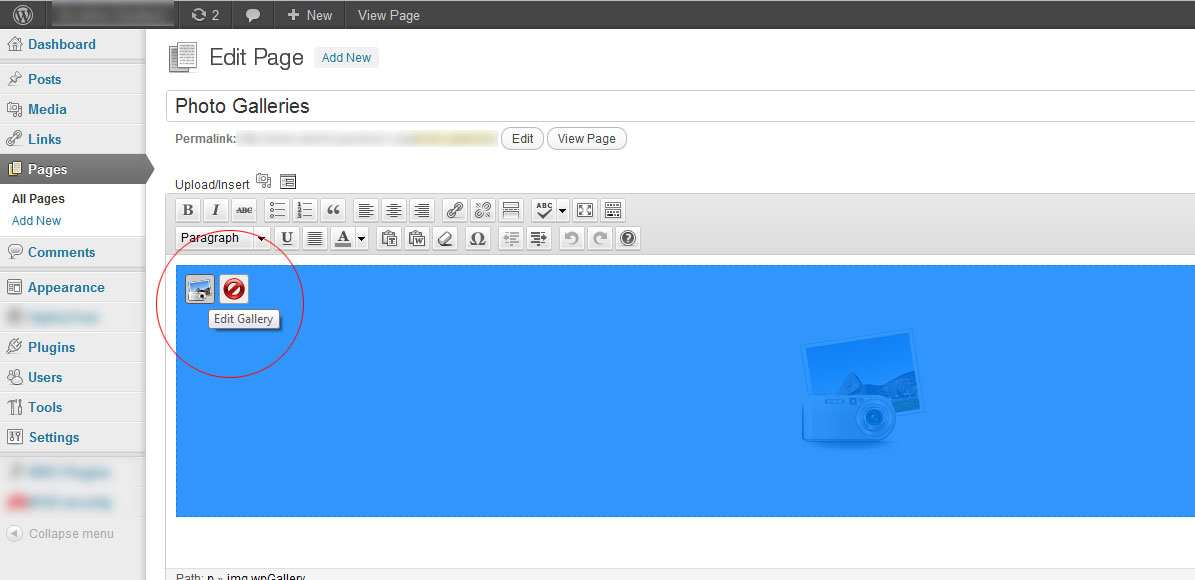
Step 2
A gallery container will be available on this page, identified by the camera & photo icon. Click on this container to reveal an ‘Edit Gallery’ Icon. Select the icon to edit and/or add to this gallery.
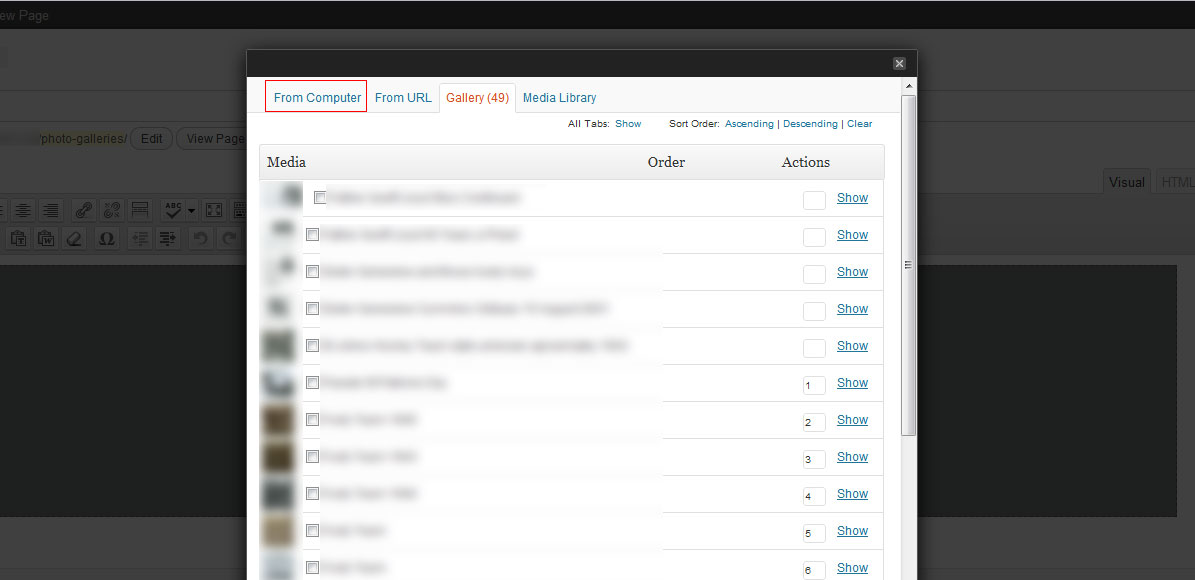
Step 3
This will open up a pop up window with the current gallery. Here you can re-order each image in the gallery. To add your new images to this gallery, select the ‘From Computer’ tab.
Step 4
From this panel you can either ‘drop your image files’ or ‘select your Image Files’ using the options provided. You can also upload multiple images at this stage. As noted, it is recommended that the images uploaded be re-sampled to screen resolution (72dpi) prior to uploading the images.
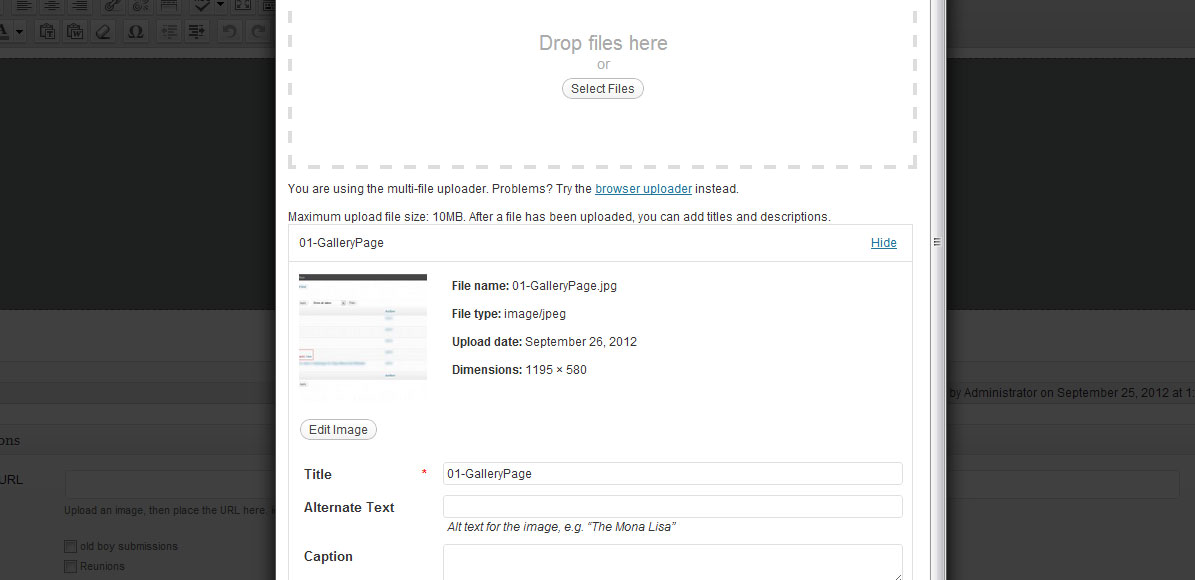
Step 5
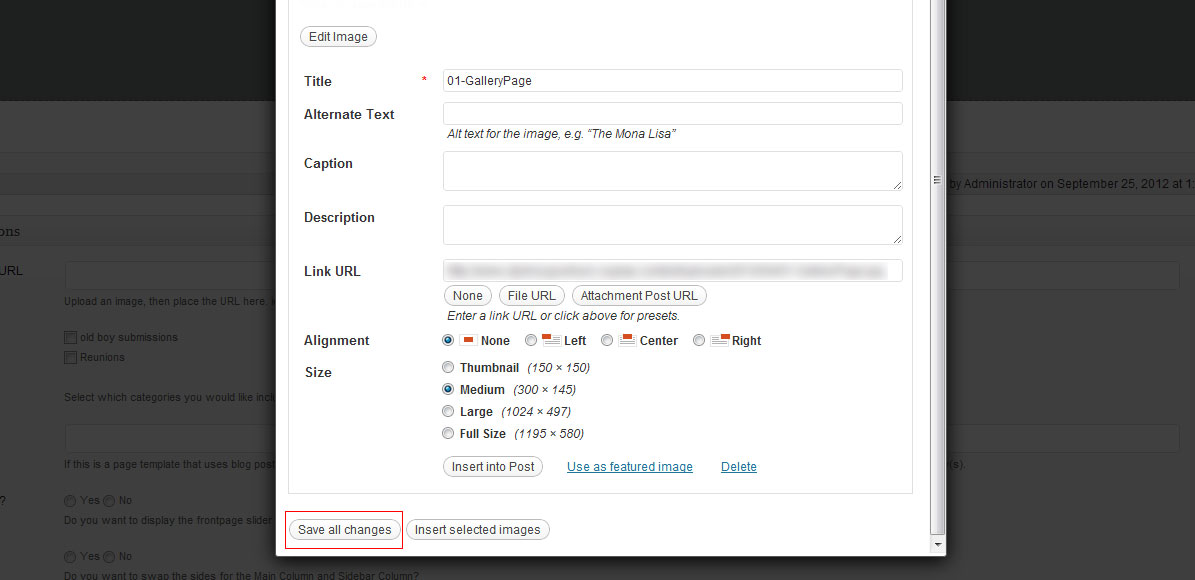
Once the images have been uploaded you will automatically be presented with text fields useful to define your image. Complete these out at your own will. As these images are intended for the gallery you can ignore the Link URL, Alignment and Size options as these will be overwritten by the default gallery settings.
Click on the ‘Save all changes’ button at the bottom of the pop up window.
Step 6
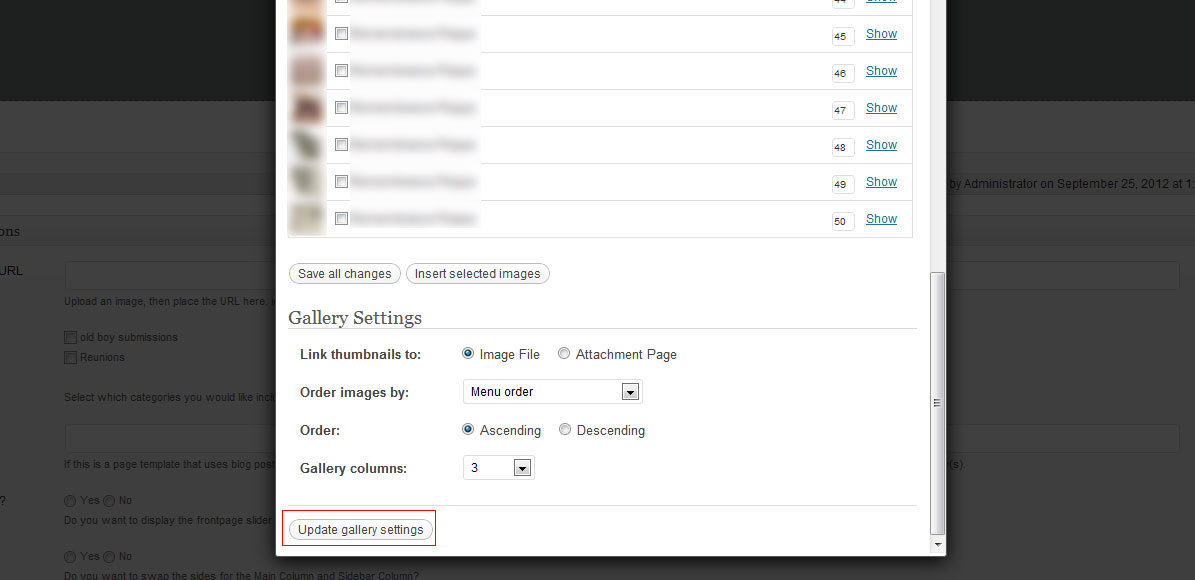
You will be automatically taken to the ‘Gallery’ Tab where your new image files will be added to the list. From here you can re-order your gallery images by dragging the images up or down the list. You can also edit the images properties by selecting the ‘Show’ link, revealing the images properties.
Once you are happy with your order, scroll down to the bottom of the gallery list and click on the ‘Update gallery settings’ button.
Step 7
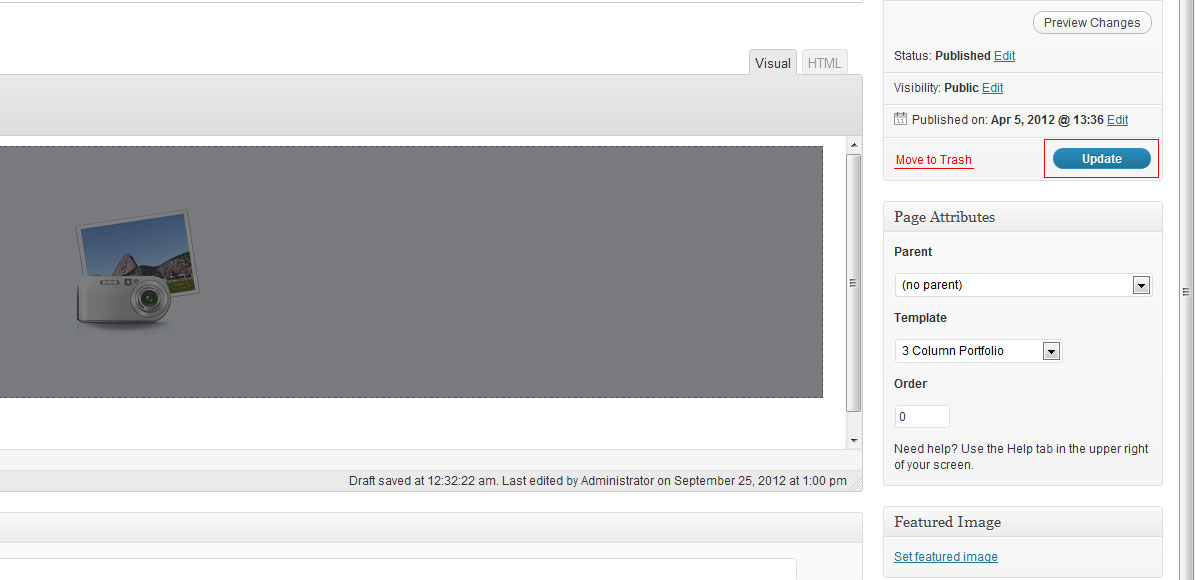
You have now successfully updated your gallery with your new images. To view this on your live website select the ‘Update’ button and review the changes on the ‘front end’ of your site.

Daniel Borg
Creative Director
psyborg® was founded by Daniel Borg, an Honours Graduate in Design from the University of Newcastle, NSW, Australia. Daniel also has an Associate Diploma in Industrial Engineering and has experience from within the Engineering & Advertising Industries.
Daniel has completed over 2800 design projects consisting of branding, content marketing, digital marketing, illustration, web design, and printed projects since psyborg® was first founded. psyborg® is located in Lake Macquarie, Newcastle but services business Nation wide.
I really do enjoy getting feedback so please let me know your thoughts on this or any of my articles in the comments field or on social media below.